
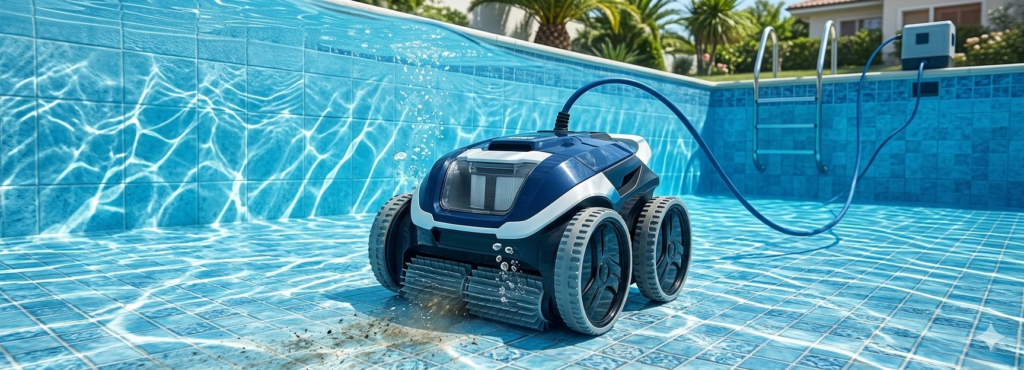
How to use vacuum pool cleaner; yours perfect pool vacuum cleaner
Get the absolute best performance out of your pool vacuum. From quick hose priming to perfect suction balance, discover our expert tips for a pristine, debris-free pool.
Table of Contents
ToggleThe real Struggle of dirty pool
On your summer day it is always a struggle to see your pool dirty. You want to enjoy your pool peacefully but the muddy;covered with leaves floor of the pool can destroy your mood.
What are the reasons behind your dirty pool?
This is actually a never ending struggle in your daily lives. Your pool is constantly dirty because of the elements of debris and dirt so, this feels like a never ending battle. These problems can occurred due to:
Poor weather or Heavy Wind
The main and prominent reason for a dirty pool can be dusty heavy wind weather. The guts of constantly blowing wind full of dust, leaves and pollen directly fell down into the water.
Growth of Algae
The growth of algae or other bacteria can cause slick and green water. The water dips even slightly then the microscopic algae begin to settle on the floor easily.
Foot Traffic dirt:
Most swimmers swim with the sunscreen oils on their bodies. Sometimes they bring grass, dirt etc with them which pollutes the water badly.
Good News : You can fix it easily
It is very beneficial that you can fix these problems without the help of professionals or any type of robot which is specially made for pool cleaning
You can fix these problems easily with only simple techniques and equipment and you will restore your beautiful crystal clear pool again in only half an hour.
Alternate guide which can help you to learn how to fix your problem
These are simple and subtle points which you can learn and fix your problems till at the end of the article
The perfect Setup
It is important to assemble your tools without any damage in your equipments
The Secret priming Tricks
It is the easiest way for removal of air pockets from the hose of vacuum.
The bestest Vacuuming Techniques
It is very useful for cleaning the dirt of the vacuum pool without stirring it up. You will know how to glide across the pool floor
Maintenance after cleaning(post cleaning)
The proper running system of filtration in vacuuming is important after you done your work.
Essential tools you have to ready
Head of vacuum
The cleanliness of pool bottom it is important to fitted small rollers and brushes with a heavy plastic head of vacuum
The Pole (Telescopic)
An adjustable fiberglass/ aluminium rod should be connected with the head of the vacuum directly. It is like a steering wheel for you
The Hose of VAcuum on its Heavy-Duty
The hose a flexible, spiral-wound will be very important to reach from one corner of pool to the other side of pool\
The Skim Vacuum Plate(Optional)
A skimmer basket with a round plastic adapter that steals tightly around it which can capture debris before it can reach to the pump filter
Vacuum Manual guide
Now you have to follow the instructions which are explained under. It is essential for you to follow all steps carefully without skipping any of them so you can sparkle your pool floor again without any debris or dirt which can be sucked in the vacuum pump or maybe your cleaning may not be completely fine.
Here is 7 step guide for your quick understanding and learning so be concentrated on these steps
Step 1. Snap the Hardware Together
Connect Pole
In the vacuum head neck you press the V-clips spring which is on the telescopic pole. You should press it until they click
The Attachment of Hose
Now you have to push the hose’s swivel cuff firmly onto the vacuum head’s intake port.
The unroll Hose
To remove coils and kinks you should straighten the hose which is remaining along pool deck
Step 2: Submerge the Setup Gently
Lower its Head
Now you have to lower vacuum head completely flat until its sits on the floor of pool so you should grip the pole and lower the head of weighted vacuum
Hose feed
Now we have to sink flexible hose into water completely loop by loop
Secure Pole
Secure Pole is used to extend the safety of the pole against the edge of the pool. This can be possible if we lean the pole within arm’s reach
Step 3: Force Trapped Air Out (The Secret Step)
End of submerge
Now push the unattached,free end of the hose underwater
Return Jet use
Now against a pool return jet we will hold this open end tightly so, the clean water streams out
Purge of Air
You can see the bubbles of air which are blasting from head of vacuum
Streams Stop
You should keep the hose pinned continuously until the bubble stops and a solid silent stream of water flow starts proving its primed. You will lock up your pump and destroy suction if you skip this point.
Step 4: Lock Hose into Suction Port
Keep it wet
When you move your skimmer you should keep the primed hose end underwater
Opening feed
Now you have to thread the wet adapter end down into the skimmer throat.
Suction Plug
Now you should push the hose tip tightly for suction so, you should push suction hole at the skimmer box bottom
Alternative(Plate)
If using a skim vacuum plate, press it over the skimmer basket and snap the hose onto its center nozzle.
Step 5: Pick Your Filter Valve Setting
To determine the correct path for the dirty water you should walk over to the filtration mechanical pad and check your multi-port valve setup. we have to differentiate and find out about the different mode of valve and their best use and how these will work according to their features
Filter valve setting
When to use it
Where debris goes
Water level Impact
Filter Mode
It is mostly used for weekly maintenance for light weight items like dust, scattered leaf
It will trap inside your filter which is in your pool tank
Water level will be stay same
Waste Mode
It is basically mode for Heavy sand/mud piles, seasonal wastage and green algae outbreaks
It sent waste directly into drain line by passing the filter
It can lower the level of water. A hose is important to fill the water again
Step 6: Vacuum with Slow, Overlapping Passes
- Go Straight: Now you will guide the head of vacuum forward towards dead straight long path with the use of your both hands
Slow Movement
Do not rush it will create a fine debris and also clouding in water before it sucked up
Overlapping strokes
You have to pull the vacuum back along the same path, now you should shift to a new line that overlaps at least 2 inches
Pattern
You should always start slowly from shallow step end and slowly work towards deepest point of floor
Step 7: System Reset and breakdowns
Clear Baskets
Now you have to empty both the baskets skimmer basket and the main pump basket strainer
Filter Backwash
To flush out trapped dirt you should use filter setting 2 min backwash cycle and then return the valve to its normal position
Disconnect
Now you have to disconnect the hose equipment by pulling it from skimmer while the pump is running then move the grass equipments Drainage of Hose: Now we should drain the hose with lift one end of the hose to trapped water empathy into grass before its rolling up
Finally, some useful guarantees:
- It works fast; you can usually restore a clear pool in 30 to 60 minutes.
- It’s inexpensive: compared to recurring professional calls or automatic cleaners, the basic tools pay for themselves.
- It’s preventive: routine manual vacuuming lowers the need for chemicals and stops major outbreaks.
- It’s fixable: most issues may be resolved by re-priming the hose, inspecting connections, or reducing your strokes if something goes wrong (lack of suction, clouding, etc.).
Final Words
Although it’s not glamorous, utilizing a manual pool cleaner is empowering. You can regain control over the cleanliness of your pool, save money, and transform a stressful process into a quick and enjoyable one with the correct setup, a little perseverance, and a regular routine. The key is adequate priming, slow, deliberate vacuuming, and concluding the job with appropriate filter care not complex equipment or costly services. If you do that, muddy floors, algae patches, and clouded water become transient annoyances rather than persistent issues.Therefore, don’t wait for the ideal device or weather. You can safeguard your summertime mood, your pool investment, and your time by carefully assembling your pole, head, and hose, priming, vacuuming, and doing routine filter maintenance.
Related Posts


Components of Regulator
Functions
Functions
The Diaphragm
The element for sensing
Chemical resistance e.g. Viton and Nitrile are used in it
The Diaphragm
The element for sensing
Chemical resistance e.g. Viton and Nitrile are used in it
The real Struggle of dirty pool
On your summer day it is always a struggle to see your pool dirty. You want to enjoy your pool peacefully but the muddy;covered with leaves floor of the pool can destroy your mood.
What are the reasons behind your dirty pool?
This is actually a never ending struggle in your daily lives. Your pool is constantly dirty because of the elements of debris and dirt so, this feels like a never ending battle. These problems can occurred due to:
Poor weather or Heavy Wind
The main and prominent reason for a dirty pool can be dusty heavy wind weather. The guts of constantly blowing wind full of dust, leaves and pollen directly fell down into the water.
Growth of Algae
The growth of algae or other bacteria can cause slick and green water. The water dips even slightly then the microscopic algae begin to settle on the floor easily.
Foot Traffic dirt:
Most swimmers swim with the sunscreen oils on their bodies. Sometimes they bring grass, dirt etc with them which pollutes the water badly.
Good News : You can fix it easily
It is very beneficial that you can fix these problems without the help of professionals or any type of robot which is specially made for pool cleaning
You can fix these problems easily with only simple techniques and equipment and you will restore your beautiful crystal clear pool again in only half an hour.
Alternate guide which can help you to learn how to fix your problem
These are simple and subtle points which you can learn and fix your problems till at the end of the article
The perfect Setup
It is important to assemble your tools without any damage in your equipments
The Secret priming Tricks
It is the easiest way for removal of air pockets from the hose of vacuum.
The bestest Vacuuming Techniques
It is very useful for cleaning the dirt of the vacuum pool without stirring it up. You will know how to glide across the pool floor
Maintenance after cleaning(post cleaning)
The proper running system of filtration in vacuuming is important after you done your work.
Essential tools you have to ready
Head of vacuum
The cleanliness of pool bottom it is important to fitted small rollers and brushes with a heavy plastic head of vacuum
The Pole (Telescopic)
An adjustable fiberglass/ aluminium rod should be connected with the head of the vacuum directly. It is like a steering wheel for you
The Hose of VAcuum on its Heavy-Duty
The hose a flexible, spiral-wound will be very important to reach from one corner of pool to the other side of pool\
The Skim Vacuum Plate(Optional)
A skimmer basket with a round plastic adapter that steals tightly around it which can capture debris before it can reach to the pump filter
Vacuum Manual guide
Now you have to follow the instructions which are explained under. It is essential for you to follow all steps carefully without skipping any of them so you can sparkle your pool floor again without any debris or dirt which can be sucked in the vacuum pump or maybe your cleaning may not be completely fine.
Here is 7 step guide for your quick understanding and learning so be concentrated on these steps
Step 1. Snap the Hardware Together
Connect Pole
In the vacuum head neck you press the V-clips spring which is on the telescopic pole. You should press it until they click
The Attachment of Hose
Now you have to push the hose’s swivel cuff firmly onto the vacuum head’s intake port.
The unroll Hose
To remove coils and kinks you should straighten the hose which is remaining along pool deck
Step 2: Submerge the Setup Gently
Lower its Head
Now you have to lower vacuum head completely flat until its sits on the floor of pool so you should grip the pole and lower the head of weighted vacuum
Hose feed
Now we have to sink flexible hose into water completely loop by loop
Secure Pole
Secure Pole is used to extend the safety of the pole against the edge of the pool. This can be possible if we lean the pole within arm’s reach
Step 3: Force Trapped Air Out (The Secret Step)
End of submerge
Now push the unattached,free end of the hose underwater
Return Jet use
Now against a pool return jet we will hold this open end tightly so, the clean water streams out
Purge of Air
You can see the bubbles of air which are blasting from head of vacuum
Streams Stop
You should keep the hose pinned continuously until the bubble stops and a solid silent stream of water flow starts proving its primed. You will lock up your pump and destroy suction if you skip this point.
Step 4: Lock Hose into Suction Port
Keep it wet
When you move your skimmer you should keep the primed hose end underwater
Opening feed
Now you have to thread the wet adapter end down into the skimmer throat.
Suction Plug
Now you should push the hose tip tightly for suction so, you should push suction hole at the skimmer box bottom
Alternative(Plate)
If using a skim vacuum plate, press it over the skimmer basket and snap the hose onto its center nozzle.
Step 5: Pick Your Filter Valve Setting
To determine the correct path for the dirty water you should walk over to the filtration mechanical pad and check your multi-port valve setup. we have to differentiate and find out about the different mode of valve and their best use and how these will work according to their features
Table
Step 6: Vacuum with Slow, Overlapping Passes
- Go Straight: Now you will guide the head of vacuum forward towards dead straight long path with the use of your both hands
Slow Movement
Do not rush it will create a fine debris and also clouding in water before it sucked up
Overlapping strokes
You have to pull the vacuum back along the same path, now you should shift to a new line that overlaps at least 2 inches
Pattern
You should always start slowly from shallow step end and slowly work towards deepest point of floor
Step 7: System Reset and breakdowns
Clear Baskets
Now you have to empty both the baskets skimmer basket and the main pump basket strainer
Filter Backwash
To flush out trapped dirt you should use filter setting 2 min backwash cycle and then return the valve to its normal position
Disconnect
Now you have to disconnect the hose equipment by pulling it from skimmer while the pump is running then move the grass equipments Drainage of Hose: Now we should drain the hose with lift one end of the hose to trapped water empathy into grass before its rolling up
Finally, some useful guarantees:
- It works fast; you can usually restore a clear pool in 30 to 60 minutes.
- It’s inexpensive: compared to recurring professional calls or automatic cleaners, the basic tools pay for themselves.
- It’s preventive: routine manual vacuuming lowers the need for chemicals and stops major outbreaks.
- It’s fixable: most issues may be resolved by re-priming the hose, inspecting connections, or reducing your strokes if something goes wrong (lack of suction, clouding, etc.).
Final Words
Although it’s not glamorous, utilizing a manual pool cleaner is empowering. You can regain control over the cleanliness of your pool, save money, and transform a stressful process into a quick and enjoyable one with the correct setup, a little perseverance, and a regular routine. The key is adequate priming, slow, deliberate vacuuming, and concluding the job with appropriate filter care not complex equipment or costly services. If you do that, muddy floors, algae patches, and clouded water become transient annoyances rather than persistent issues.Therefore, don’t wait for the ideal device or weather. You can safeguard your summertime mood, your pool investment, and your time by carefully assembling your pole, head, and hose, priming, vacuuming, and doing routine filter maintenance.